|
|
Post by fishipswichbay on May 6, 2014 5:49:28 GMT -6
Hi Everyone!
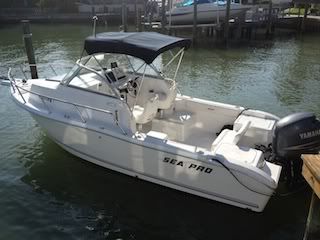
I am the owner of a 2004 Sea Pro 220WA
I am struggling to find a solution for my White Navigation Light. It is located on top of my windshield and on a small extension pole that pivots down to stow laying down the front of the windshield or can be brought to a straight up position during use.
The thing is, it is blinding at night. And even if I only turn on the front bulb, the light reflecting off the white bow of my boat makes it very easy to see my bow, but the water immediately after that is complete darkness. Also with having just the front half of the light on, so that it doesnt shine into my eyes, I kind of think it defeats the purpose as now I have no light for someone approaching from behind.
Has anyone else struggled with this same issue?
Thanks in advance!
|
|
|
|
Post by rfracing on May 6, 2014 6:47:36 GMT -6
|
|
|
|
Post by CaptWoody on May 6, 2014 10:02:36 GMT -6
Make it taller, put a light shield beneath it, or replace it with a stern mounted light. By law it must be visible 360 degrees.
|
|
|
|
Post by fishipswichbay on May 7, 2014 7:02:44 GMT -6
Thanks guys
|
|
|
|
Post by hbahn on May 7, 2014 18:18:43 GMT -6
I have the exact same problem on my 210. The light is blinding. I would like to find a replacement that has the same mount as the existing unit.
|
|
|
|
Post by T-Topless on May 12, 2014 23:41:08 GMT -6
Its mounted up above the canvas on our T-Topless so there is NO glare inside the hull at all ...
|
|
Deleted
Deleted Member
Posts: 0
|
Post by Deleted on Oct 26, 2014 13:59:00 GMT -6
I had the same problem with a perko light that was a white all around. The pole was too short and the light blinding. It was brand new and after one use I took it off and threw it in the garbage. It was dangerous.
I now have a 20" Atwood led light which is taller and hopefully the led design doesn't blind. It appears to project the light visibly out as opposed to down, up and around. I've yet to be out in total darkness with it since swapping it though. If it's a problem I'll find a way to lengthen the pole as I could probably get another few inches and it still lay flat.
|
|
|
|
Post by acdaddy0 on Oct 26, 2014 14:28:30 GMT -6
Make it taller, put a light shield beneath it, or replace it with a stern mounted light. By law it must be visible 360 degrees. Yes a light shield is what you need! They have some globes that light down and out and some that only light out. You must have both nav. Lights on at night. A stern light would have to be really tall on your boat to be seen from all directions. They put it there so it's visible 360 degrees . Send picture of globe. You can fab a sheild if ones not available for your application. Get the light off your bow but out to everyone else. |
|
yolo
Ensign

Posts: 626
Location: Back to Manasquan Inlet, NJ
|
Post by yolo on Oct 28, 2014 15:37:59 GMT -6
Here is another option assuming you have the screw in mount which it sounds like you do. I did this on my buddies grady walk around two seasons ago and we made the pole five feet tall so it was better seen at night too. He was set up just like you with the outboard on the back so the stern light with the 180 anchor light was not an option. First thing to do is dismantle the light. Splice the wire (within this idea you are going to put a plug on later, there should be a screw at the top and bottom holding the lamp and mount on. Remove the mount first and then the wire will pull right through the pole when you remove the lamp from the top. Next, take the pole to home depot and seek out the similar diameter and length (i bought a big piece for my friend and cut it myself). Stop at the auto parts store and get a length of type two or type three wire (type three is best), 16 gauge should do for this, a tube of dielectric grease and a package of heat shrink butt connectors. You will also need one of these two pin connectors from the auto parts store: www.delcity.net/store/2!Way-Connector-Loop/p_8771 (website just for example) Take everything home: 1. Drill the holes in the new pipe (use the old for map) 2. Extend the power leads from the lamp (use the wire you bought, put the dielectric grease on the exposed ends, connect & crimp, then heat shrink) 3. Re install the lamp 4. Run the leads through the mount and install the mount 5. Install the one pin connector to the light leads, MAKE SURE THE POSITIVE PIN IS EXPOSED ON THIS SIDE 6. Install the one pin connector to the power lead on the switch side, MAKE SURE THE NEGATIVE PIN IS EXPOSED ON THIS SIDE (this way if a switch is flipped while the light is not connected then the positive is protected and cannot short if it comes into contact with something it does not like) |
|
yolo
Ensign
Posts: 626
Location: Back to Manasquan Inlet, NJ
|
Post by yolo on Oct 29, 2014 7:29:03 GMT -6
Ps to my post yesterday.
The reason for the plug (also put dielectric grease on the exposed leads, when you plug it together they will fill the non exposed) is so you can detach and stow the anchor light when you don't need it!
|
|


 Drop your top and go


